Recipes
Red Lentil Burger Buns (Gluten Free, No Flour)
I made these soft, flour-free burger buns for my husband. They're gluten free, dairy free and egg free, and they only need a blender and an oven. Here's how they work, and the honest truth about the carbs.
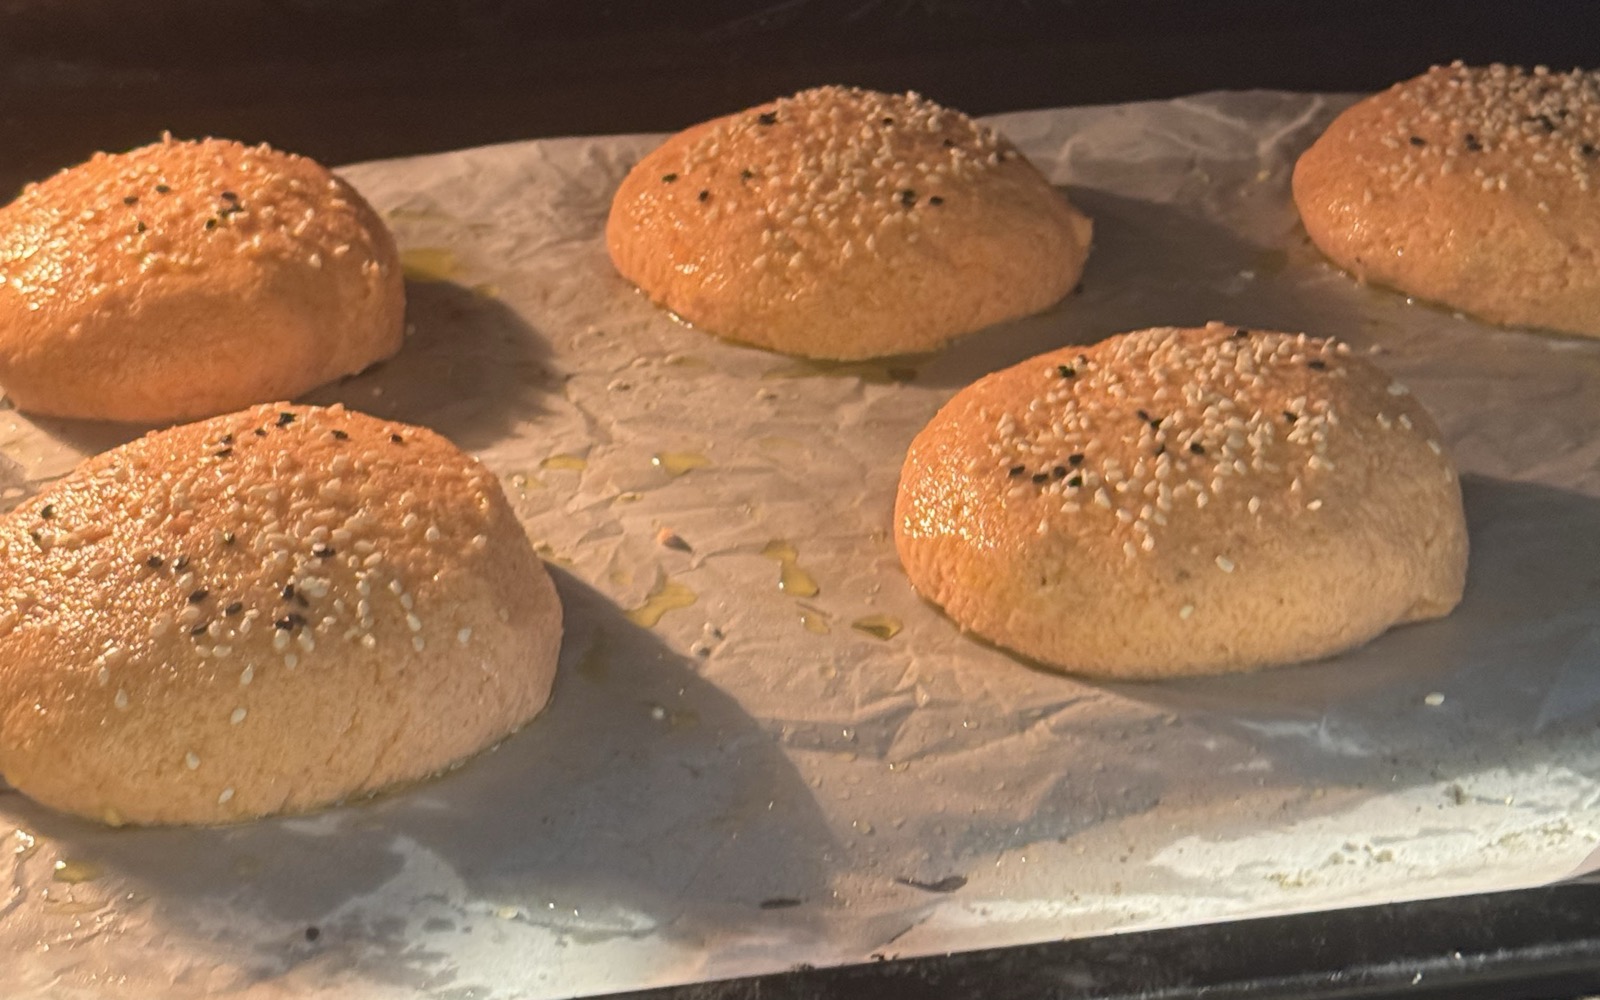
I made these burger buns for my husband, and they turned out really well. Burgers are his favourite food, so I wanted to make him a bun to enjoy one in. These hold a burger, they don't use any flour, and they only need a blender and an oven.
He started this keto journey to support me, and he has seen great results too. Every now and then he enjoys some carbs, and that's completely fine. His metabolism is completely different from mine, so what works for him isn't what works for me.
I don't eat these buns often myself. When I do, I have a small slice and I enjoy it for what it is. I'll explain why below, because I think you should know before you make them.
Where I need to be honest about the carbs
I first saw these called "low carb" buns, and I want to be careful with that label, because it isn't quite true.
Red lentils are a legume. Dry, they have roughly 60g of carbohydrate per 100g, and about 10g of that is fibre. A batch made with 500g of dry lentils has around 300g of carbohydrate in total, and about 250g of that is net carbs once you take the fibre out. Spread across the 4 to 6 buns a full batch makes, that's roughly 40 to 60g of net carbs per bun. That's an estimate from typical lentil labels, so check the packet of the brand you use. A regular shop-bought burger bun has around 25 to 30g, so these are not lower in carbs than a normal bun.
So what are they good for? They're gluten free, dairy free, egg free and flour free. They have more fibre and protein than a white bun, so they tend to be more filling. That makes them a good choice if you avoid gluten or grains. If you need to be strictly gluten free, check that your lentils and psyllium are labelled gluten free. But if you're counting carbs on keto, these aren't the one for you.
For me, that's why a small slice is enough.
Carbs have a place, and portion is the key
I don't think carbs are the enemy. What matters is when you have them and how much.
In my own experience, the luteal phase (the second half of your cycle, after ovulation) is the time when a little extra carbohydrate sits better with me. I think a carb-up in that phase is okay, and I'd rather plan for it than fight it. This is simply my view from living in my own body, and every body is different.
The part I never skip is the portion. So here's how I'd approach these buns:
- Keep it small. A thin slice, or half a bun, is plenty.
- Pair it with protein and some fat. A burger patty, an egg, or avocado slows things down, so you're not eating the bun on its own.
- Listen to your body afterwards. If you have PCOS or insulin resistance, or you're managing your blood sugar, notice how you feel, and check with your doctor if you're unsure.
A mindful small portion lets you enjoy the food without being stuck in "all or nothing" thinking.
Why it works
Each ingredient has a job.
- Red lentils are the base. They cook down soft and blend into a smooth, thick dough, with none of the grittiness of other lentils.
- Soaking softens them so they blend completely smooth. Give them at least 5 hours, and I leave mine overnight. Draining them very well matters just as much, because extra water makes a gummy bun.
- Psyllium husk is the binder. It soaks up water and turns into a gel, which gives the buns their springy, bread-like crumb. Ground flax does the same job if that's what you have, just in a bigger amount.
- Baking soda and apple cider vinegar make them rise. The vinegar reacts with the baking soda and fizzes, and that gas lifts the dough as it bakes.
- Oil keeps the buns soft rather than dry, and it stops the dough sticking to your hands when you shape it.
Tips for the best buns
- Drain really well. After rinsing, shake the lentils in a sieve and let them sit for a few minutes. A wet dough is the number one reason these turn out gummy.
- Pulse the vinegar in quickly. Five seconds is enough. If you blend it for longer, you lose the fizz that makes them rise.
- Shape them the way you want them to end up. They hold their shape in the oven, so a flat disc stays flat. Aim for about 1 inch thick, with smooth tops.
- Use oiled hands. The dough is sticky, and a little oil makes shaping easy.
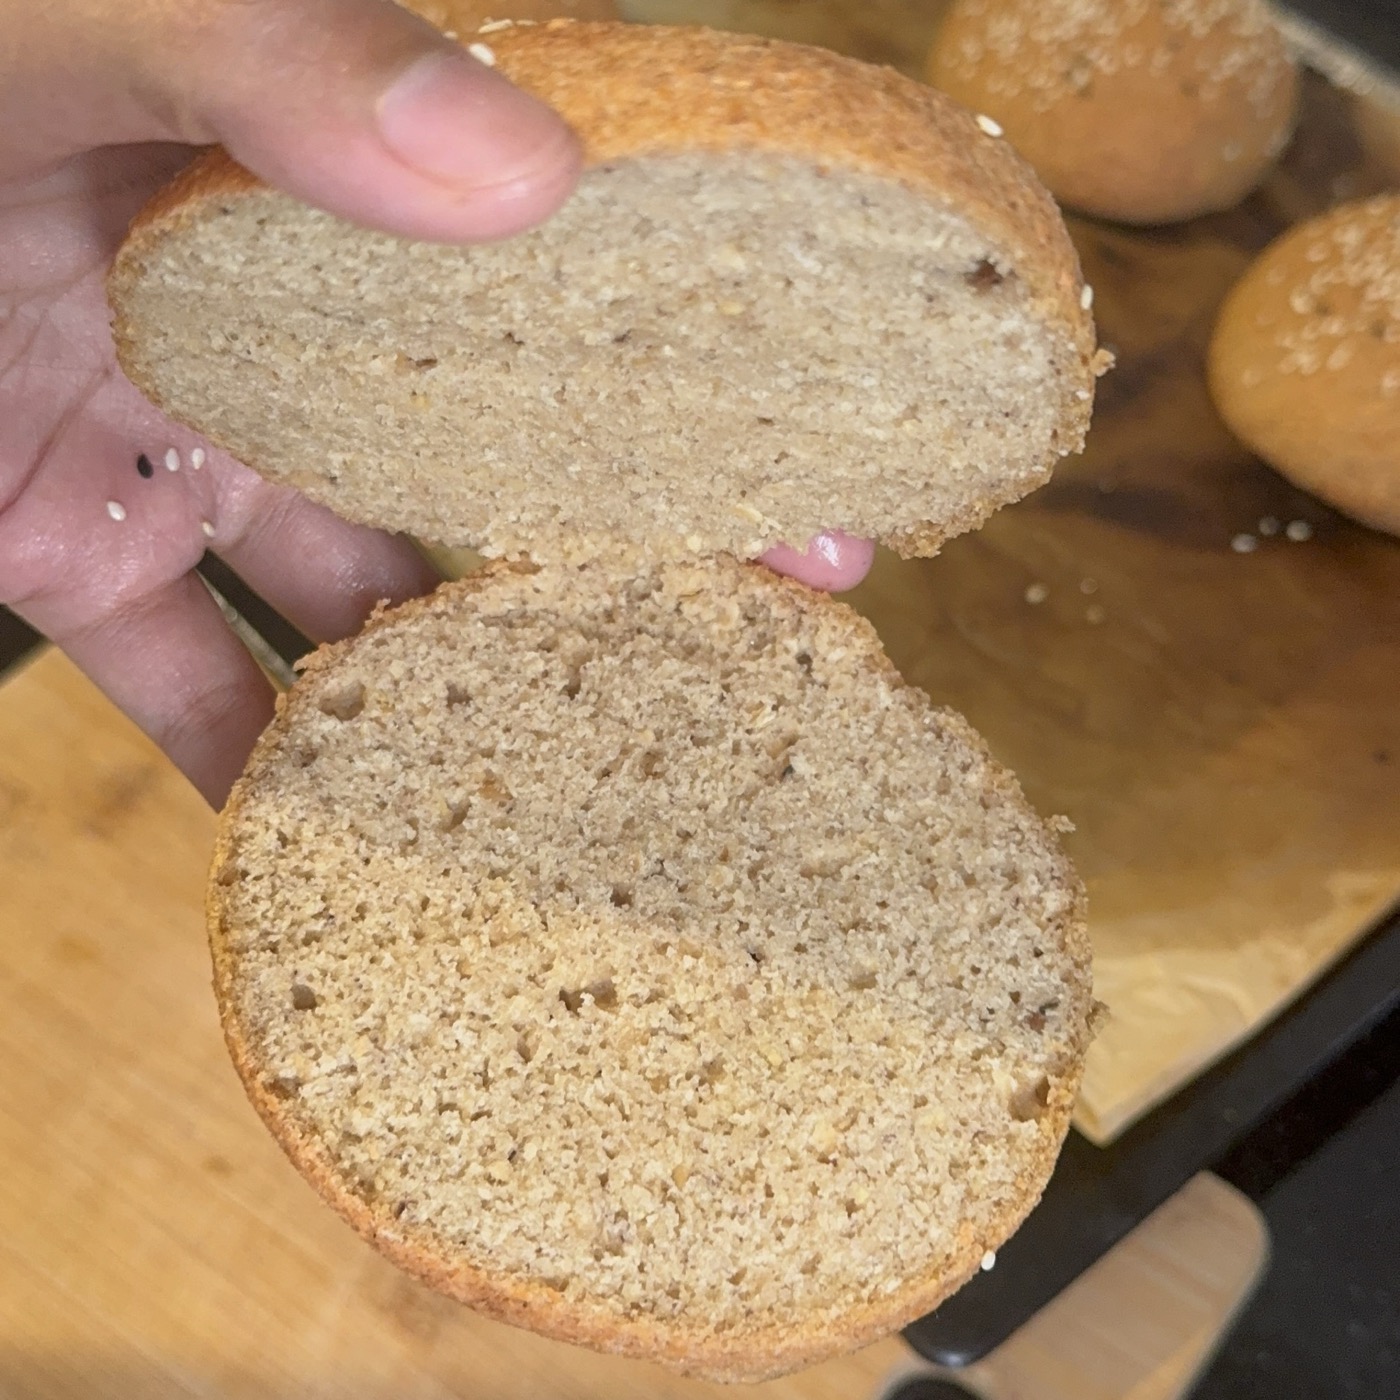
- Wait before you slice. They set as they cool. If you cut one open hot, it can look underdone when it's actually fine.
If something goes wrong
- The buns are gummy in the middle. The lentils were probably not drained well enough, or the buns were cut while still warm. Next time, drain for longer and cool them fully. A few extra minutes in the oven can also help.
- The dough is too wet to shape. Add another spoonful of psyllium, mix, and give it 5 minutes to thicken.
- They taste a little earthy or bitter. That's usually the psyllium. Check that yours is fresh, or try the ground flax version instead.
- They turned a bit grey or purple. Some brands of psyllium do that when they meet baking soda. It looks odd, but it's harmless and it doesn't change the taste.
- They didn't rise much. Your baking soda may be old. These buns don't rise as high as wheat buns, but they should puff slightly.
Storing them
Once they're completely cool, keep them in an airtight container in the fridge for up to 4 days. They also freeze well. Wrap them individually, freeze for up to 3 months, and thaw them overnight in the fridge. A few minutes in a toaster or a hot pan brings back that fresh-baked texture.
Ways to eat them
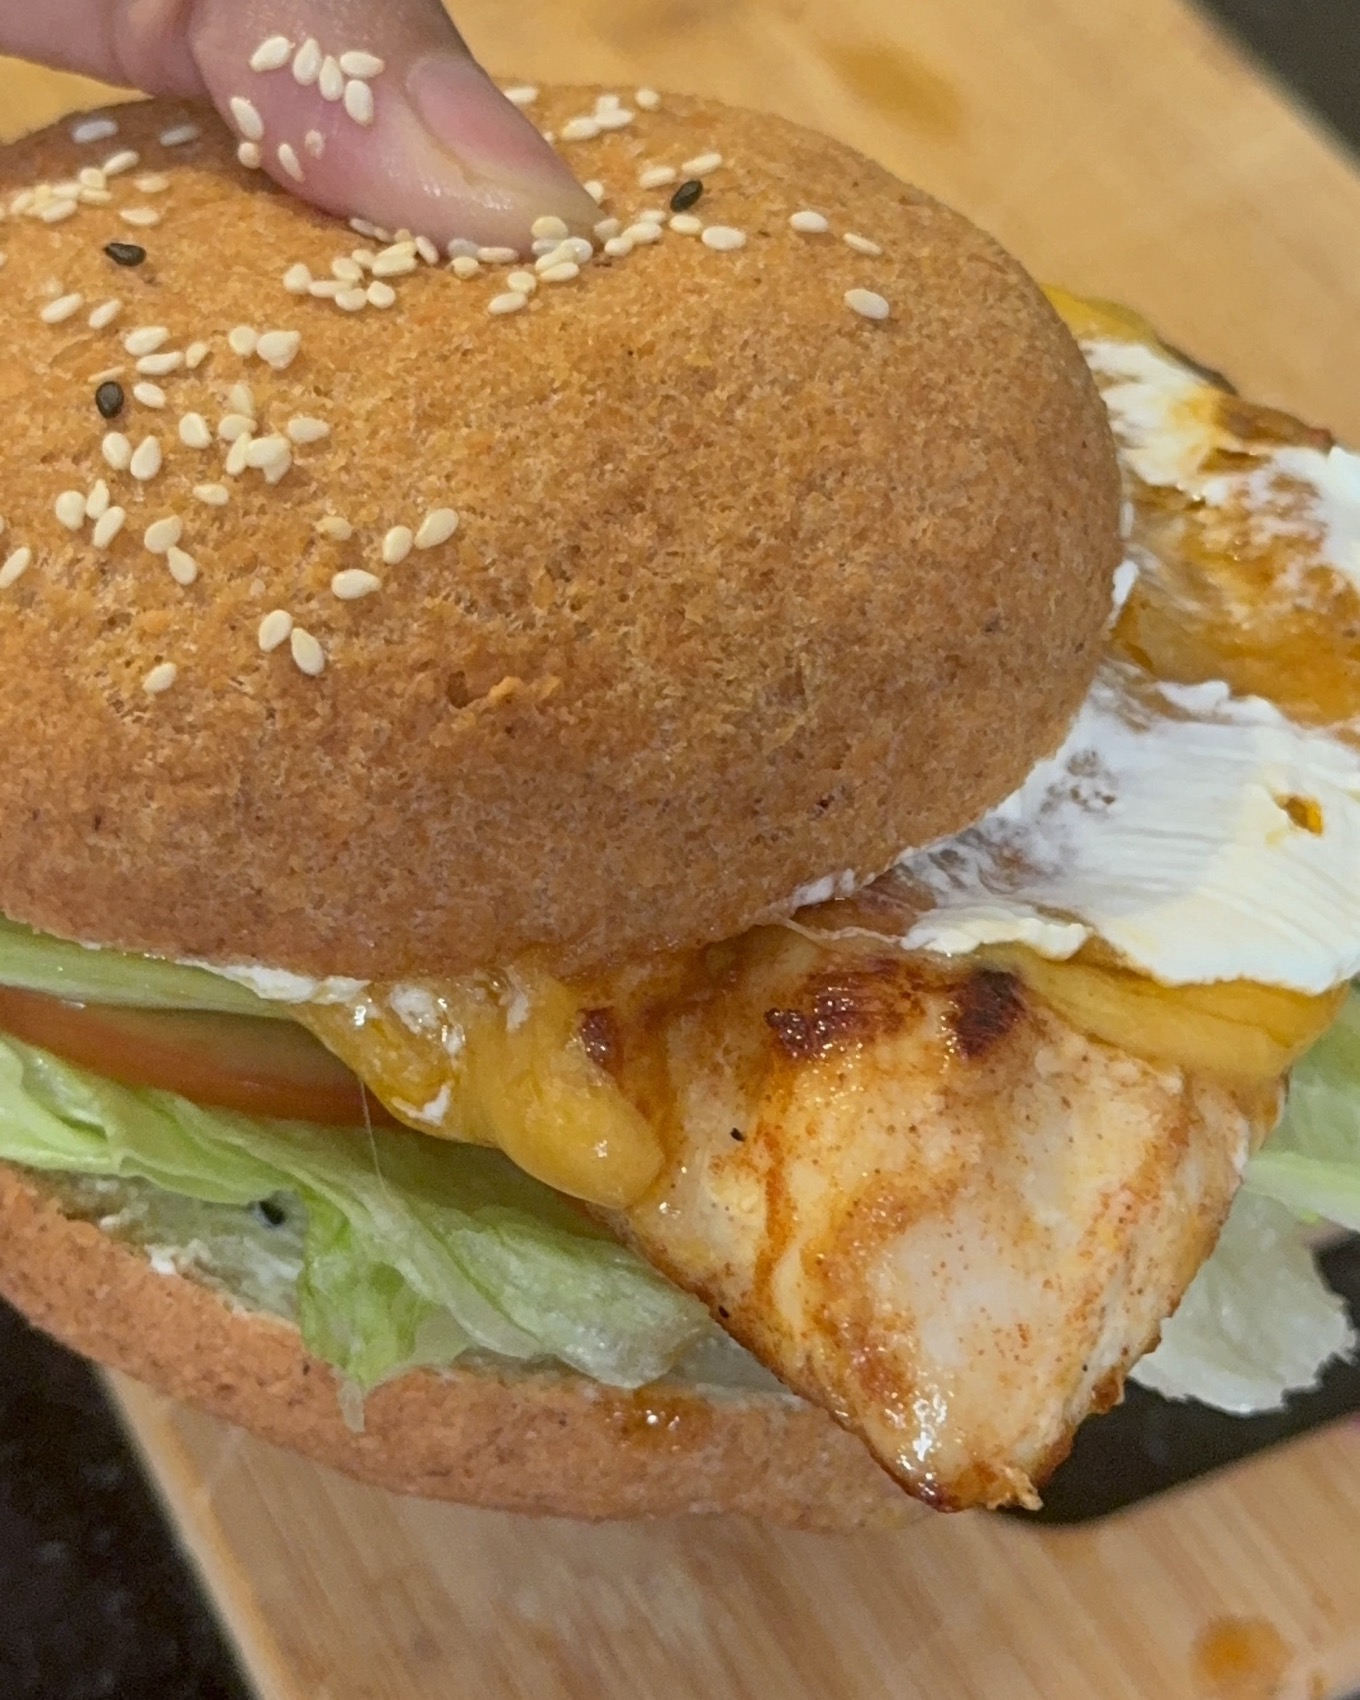
You can eat these buns any way you like. They work best as a burger bun with a beef or chicken patty, a slice of tomato and some lettuce. You can also treat one like a bagel. Split and toasted, with cream cheese and smoked salmon, it's a perfect pair. If you avoid dairy, a dairy-free spread works too. They're also good with a breakfast egg, or cut into thin slices and served beside a bowl of soup. Remember that they're filling, so one small slice goes a long way.
A quick note
Lentils and psyllium are both high in fibre. If your digestion is sensitive, or you're healing from a flare, start with a small piece and see how your body feels. I'm not a doctor, and this isn't medical advice.
So, friend, have you tried a lentil bread before? Tell me how it turned out.
Red Lentil Burger Buns (Gluten Free, No Flour)
The recipe
- Prep
- 15 minutes
- Bake
- 30 to 40 minutes
- Soak
- At least 5 hours
- Serves
- 2 to 3 buns
This is a half batch. Choose 1× for the full recipe. Amounts only. Pan size, times and temperatures stay the same.
Ingredients
Tap an ingredient to tick it off as you go.
The lentil dough
The lift
To finish (optional)
Method
Soak the lentils
- Cover the red lentils with plenty of water and leave them to soak for at least 5 hours. I leave mine overnight.
- When they're ready, rinse them and drain them very well. Shake them in the sieve and leave them for a few minutes. Extra water is the main thing that makes these buns gummy.
Heat the oven
- Heat the oven to 190°C (375°F) and line a baking sheet with parchment paper.
Blend the dough
- Blend the drained lentils with the water, oil, psyllium husk (or ground flax) and salt until completely smooth. Scrape down the sides once or twice.
Add the lift
- Add the baking soda to the blender, then pour the vinegar right on top and let it fizz.
- Pulse for 5 seconds to mix it through. Don't blend any longer, or you'll knock the air back out.
Shape the buns
- Scoop the thick dough into equal mounds on the baking sheet, leaving a little space between them. A full batch makes 4 to 6, and a half batch makes 2 to 3.
- Rub a little oil on your hands and shape each mound into a smooth, rounded disc, about 1 inch (2.5cm) thick. They won't spread much in the oven, so what you shape is what you get.
Top (optional)
- Brush the tops with a little oil and sprinkle on the sesame seeds, if you like.
Bake
- Bake at 190°C (375°F) for 30 to 40 minutes, until the tops are golden and firm to the touch.
Cool before slicing
- Let the buns cool on a wire rack for at least 20 minutes before you cut them. They finish setting as they cool, and a warm bun can feel soft in the middle.
Thanks for reading.
More on PCOS, real food and faith, written from the middle of it.
One email a month. Unsubscribe any time.